Road cycling techniques, skills and pedaling tips to ride like a pro
Sure, you can ride a bike. But can you ride like a Canyon pro rider?


One of the most common phrases “It’s just like riding a bike.” It’s so simple, anyone can do it, right? Well, there’s a difference between the way most people ride a bike and how professionals like Mathieu van der Poel and Chloe Dygert ride their Canyons. Here are some tips to take your riding to the next level.
Contents
Importance of mastering road cycling techniques
Professional road racers have spent decades on their bicycles, mastering the art of cycling. By understanding certain road cycling techniques, they’re able to ride faster, longer, and across terrain that would leave amateurs desperately gasping for breath. Honing these skills keeps you and the riders around you safer and happier as well.
If you’re committed to becoming a better rider, you should devote time to improving these same skills on your Canyon road bike. Many racers will devote time at the beginning or end of their training sessions to practicing these skills. If you ride with a group of friends, it can be fun to work on these skills as a unit.
Fundamental road cycling skills
As you start riding with other fast cyclists and maybe even think about pinning on a race number yourself, you should have a basic understanding of these skills.
Balancing and control
Balance may be one of the most neglected skills of road riders. Balance keeps you safe when riding in a pack, allowing you to stay upright when making contact with another rider. It allows you to make small adjustments with your body positioning rather than over-steering, so you can avoid road debris. Great balance also allows you to control your bike with your hands off the bars, a needed skill when taking off a rain cape or holding your arms aloft when crossing the finishing line first.
A strong core is key to control and balance, so supplementing your cycling with yoga, strength training, or both, should be considered.
Cornering techniques
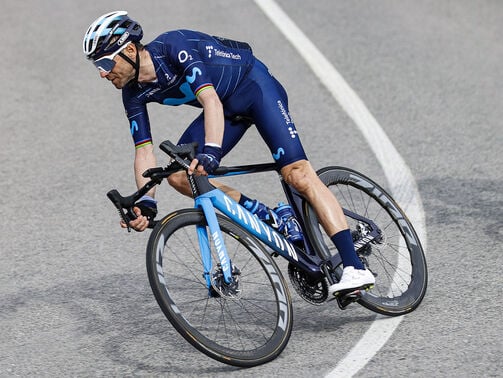
One of the biggest mistakes novice riders make is braking in the midst of a turn. Riders should brake before entering into corner, allowing you to better control your speed and stability. Instead of staring at your front wheel, keep your eyes on the turn exit. Start Pedaling again as soon you cross the apex. For the most control, try cornering in your drops and leaning more than steering. a
Climbing and descending
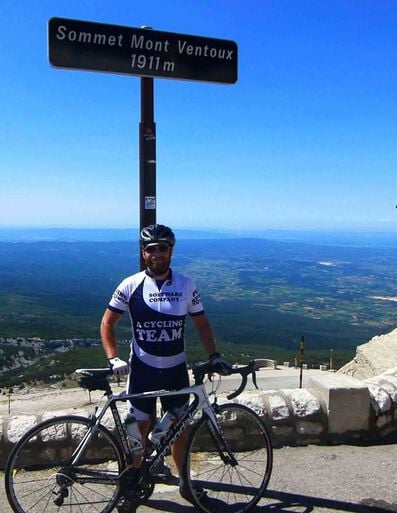
Pedaling up a huge climb is a rite of passage for all cyclists. Alternate between sitting and standing on the pedals, allowing you to use additional muscles in your legs and core. Don’t push too hard of a gear; a steady, easier cadence will get you to the top of the climb without wrecking your legs for the rest of the ride. Switch gears before the gradient steepens so you’re not killing your derailleur.
The secret of descending is confidence. Look further ahead so you’re prepared for turns or obstacles. When descending switchbacks, follow the cornering advice, just at a much faster speed. Don’t be content coasting downhill; shift into a harder gear and pedal to increase your speed even more. If you’re going a touch faster than you’d like, sit up in the saddle and let the drag of your body slow you down without touching the brakes.

Advanced road cycling techniques
Once you’ve mastered the basics of fast-paced riding, you can still kick it into an even higher gear.
Drafting and paceline riding
If you’re serious about racing or participating in a fast-paced group ride, learning how to draft in a paceline is crucial. The closer you can safely ride behind the rider in front of you, the better. More experienced riders might be a few inches behind the leading rider’s back wheel, while novices may be an entire bike length behind. Don’t stay in the front for long periods of time, perhaps a minute or two at most. When you get to the front, maintain a steady pace. Be careful not to accelerate, which can stretch the group. Riding into a headwind? Take your pull for a few seconds, then rotate to the back. Shorter pulls keeps everyone fresher.
Most importantly, keep focused on the task at hand. Riding safely in a paceline requires concentration.
Braking efficiency
Knowing how and when to brake will help you tremendously in a race or fast-paced group ride scenario. Disc brakes offer significantly more stopping power than traditional rim brakes, which is why all Canyon models come with discs standard.
Your front brake provides about 70 percent of your stopping power, but if you squeeze it too hard, the sudden stopping force moves your weight forward, sometimes sending you over the handlebars. When grasping the levers, move your weight behind your saddle and use your front arms as a brace.
Riding in different weather conditions
Pedaling in wet conditions requires some precautions. Start out by lowering the pressure in your tires 10-20 psi, which will give you more surface contact with the road. Start your braking well in advance of a turn, staying upright and not leaning into the turn. When slowing, pump your brakes rather than giving them a hard squeeze, which may result in loss of control. Focus the majority of your braking force on the rear wheel. Shift your weight back, maximizing rear wheel traction.
If you’re riding into heavy wind, your best option is to ride as low, with as much of your body tucked in as possible to reduce drag. (The Aeroad can help with that!) When encountering crosswinds during a group ride, form rotating echelons, where the lead rider temporarily shields the other riders before retreating backward.

Proper bike pedaling
Pedaling is the most basic skill in cycling, right? But it turns out many riders are doing it wrong! With a few simple tweaks, you can quickly become a faster and stronger rider.
Pedaling mechanics
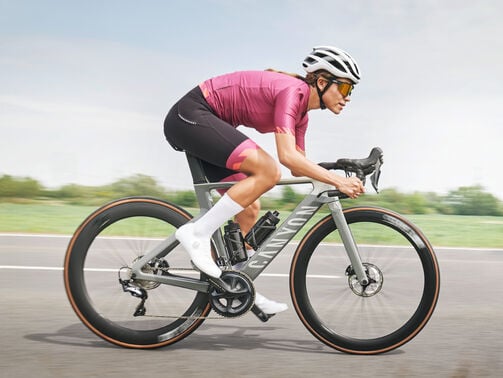
By only concentrating on downward pressure on the pedals, you’re losing a tremendous amount of power. When your foot reaches the bottom of the pedalstroke, you need to lift upward, focusing on making a full circle. It’s amazing how much stronger you can be with that one simple tip.
Cadence optimization
Recent studies have found a steady cadence of 80-100 rpms is most efficient for cyclists. (Most beginner riders pedal more slowly, typically 60-80 rpms.) Cadences between 80-90 rpms are best for ultra-endurance riding when you’re attempting to conserve energy. Racers and riders doing a competitive group ride should aim for a sweet spot between 90-100 rpms, which is optimum for power production.
All that said, if you do race, you should also work in high-cadence drills between 100-120 rms, which will pay off during sprints and attacks.
Power distribution
Training with a power meter is one of the best ways to measure your improvement as a rider, which is why several of the higher-end Canyon road bikes come with power meters standard. Doing interval training, where you’re putting forth more effort in between easier segments, does wonders to increase your power output.

Equipment and setup for optimal performance
If you want to be great on the bike, you need a great bike. That not only means getting the Canyon that’s ideal for your preferred riding style, but also setting it up like it’s an extension of your own body.
Proper bike fit
You’re making a significant investment with your new Canyon bicycle, and to get the most out of it, you should consider a professional bike fit. Many riders may know where their body needs to be on the bike, but sometimes being a centimeter or two off anywhere on the bike can lead to pain or loss of optimal power. A professional fitter uses specialized equipment and sometimes even computer software to dial your fit to the millimeter, whether you’re looking to maximize your speed potential, increase your comfort, or help you recover from an injury. A quick internet search will help you find a bike fitter in your area. Doing it yourself is cheaper, but does require quite a bit of time, as well as trial and error.
Ideal saddle height and position
When setting up your saddle height, measure 88 percent of your inseam height from the top of the saddle to the parallel pedal closest to the ground. Generally, your knee should be bent between 25 and 35 degrees at the downstroke of your pedal stroke for optimal power and efficiency. A too-high saddle will make pedaling much more difficult. A too-low saddle can cause tightness in your hamstrings and lead to a strain.
Saddle position may be the most important part of a bike fit. Per regulations, pro cyclists must have the seat nose a minimum of 5 cm further back than the center of the bottom bracket. That’s a good place to start. You’ll generate more power the closer you are to that measurement, pushing down on the pedal instead of outward. However, if that’s not a comfortable riding position, you should incrementally move the saddle backward until it feels right. You may also have to adjust the seat height as you adjust the saddle position. It’ll likely take at least several rides to dial everything in perfectly.
Cleat positioning
Most serious road cyclists ride using specific road bike shoes and pedals. But just like with everything else on your road bike, you can’t just slap cleats on the bottom of your shoes and expect for everything to be perfect right away. Where you place your cleats has a massive impact on not only the comfort of your feet, but also how your ankles, knees, and hips align. If you’re having knee pain when riding, there’s a very good chance it’s due to your cleat placement.
If your current shoe and cleat placement are working, don’t feel the need to change anything. When upgrading to new cleats, try to mimic the placement as precisely as possible. If you’re starting from scratch, try to align the center of your cleat with the ball of your foot (specifically midway between your first and fifth metatarsals and slightly back). From there, you can move the cleats forward, allowing you to better change speed rapidly and accelerate, or backward, adding stability and decreasing toe overlap with your front wheel. From there, set the lateral position, which should be dictated by your stance and pelvic width. Finally, the amount of float in your cleats should be dialed in. The more float you have, the more natural your knee and ankle movements will be. Too much float loses stability; too much float leads to potential injury and pain. Discover how to choose the best cycling footwear for optimal road bike performance in our buyer’s guide, featuring top options like Canyon cycling shoes.

Did this article help?
Thank you for your feedback
-
 About the author
Robert Annis
Robert Annis is an award-winning outdoor-travel journalist. As an experienced writer and sport enthusiast he writes content that is inspiring with focus on road biking. You might have read Robert's articles in Bicycling, National Geographic, Outside, Travel + Leisure, Inside Hook, AARP, Midwest Living, Sierra, Hemispheres, Departures, Lonely Planet, Afar, Los Angeles Times, Chicago Tribune, RV Magazine, and Hidden Compass.


