Adjusting MTB gearing – a simple manual
If your mountain bike won’t shift into gear, the chain rattles or jumps, gear indexing is often the reason for this. We will show you how to adjust your MTB gearing correctly.

Contents
Adjusting MTB switchgear
Mountain bikes are now equipped with derailleur gearing as standard. Some of the best known manufacturers include Shimano and SRAM. In another blog post, we explain how an MTB groupset is structured and how it works.
Whether it’s Shimano Deore, Shimano XT or SRAM NX - whichever bicycle gearing you have, doesn’t really matter when adjusting switchgear. The work steps are the same for mechanical gearing.
Causes of imprecise switching
First, it is important to find out why the mechanical bicycle gearing on the mountain bike is not working properly. This is the only way to adjust it with precision. These are the most common reasons for gearshift problems:
- The bike or the gear cable are new: The gear cable expands during the first few trips so must be readjusted.
- The gear cables are dirty: Depending on the bike’s use, the lines can become dirty even in modern systems with good seals. This is especially true if you are often out and about on wet terrain. You can find out how to clean a mountain bike without damaging it in our blog.
- The derailleur hanger is not straight: If the derailleur hanger is bent due to a fall or rock contact, the gearing on the mountain bike can no longer be smoothly adjusted. Either replace it or have it straightened. To check, put it into a medium gear. Look at the derailleur hanger from behind - the two pulleys must be positioned exactly vertically below the cogs.
- Outer casing and cables are worn out: You can check the condition by switching from the largest to the smallest cog without turning. The gear cable stretches so that you can pull off the end caps on the outer casing. If corroded or damaged, it is recommended to install new outer casings and cables.
- Rear wheel not fixed: Check that the rear wheel is fitted correctly in the frame. Is the idler gear fitted properly and is the axle tightened enough?
- Material wear and tear: If there are switching problems due to material wear and tear on the chain and cassette, only replacing the components will help.
Step by step: Adjusting switchgear
In order to be able to adjust the gear shift on your MTB, the rear wheel must be able to rotate freely. It is best to affix your bicycle to a mounting stand.
1. #1 - Check and adjust swivel range
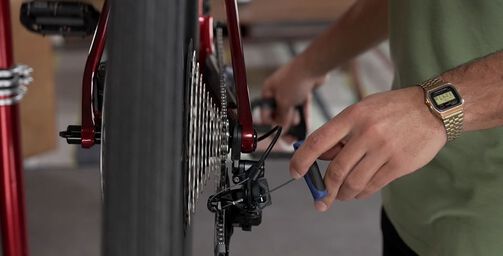
The swivel range of the switchgear is limited in both directions by the end stops. These prevent the chain from coming off the largest or smallest sprocket. The swivel range is adjusted using two screws located at the rear of the switchgear. The screw for the high gear limit stop is marked with the letter L with Shimano and SRAM and the screw for the low gear limit stop is marked with H.
To adjust the low gear limit stop, switch to the smallest cog. Look from the rear of the switchgear and adjust the H-bolt so that the upper pulley or the jockey pulley is directly under the smallest cog. If you turn clockwise, the switchgear will move to the left. If you turn in the opposite direction, the switchgear moves to the right. Carefully move to the correct position with quarter and half turns.
Now slowly shift up until the chain is on the top cog. It must not get caught between the cassette and spokes. From behind, check whether the top pulley is in line with the largest cog. The switchgear can be corrected in this position using the L-bolt.
#3 Fine adjustment of gear changes: Adjusting tension
Then gradually shift the gears of the bicycle gearing while turning. Observe whether they engage correctly and whether the chain runs centrally over each cog. If it clicks or jumps, you must adjust the tension. The tension or knurled screw is on the gearshift lever, on older bikes it is located at the back of the switchgear. If the chain climbs up slowly, increase the tension by tightening the screw. If it slowly shifts down, release tension. Unscrew the screw.
#3 - Check chainguard
The gear case specifies how far away the jockey pulley is from the cog and how far the cog is enclosed by the chain. It can be adjusted using the B-screw, which sits above the two stop screws. The distance between the pulley and cog should be approx. 5 mm. If too small, turn the screw in a clockwise direction. If too big, tighten it.
Adjusting the derailleur on the MTB
If your MTB has a 2by gearing, the derailleur must also be adjusted. Like the switchgear, there are two adjusting screws on the drive unit that limit the swivel range. Use the L-bolt to set the low gear limit and the H-bolt to set the high gear limit.
This is how you proceed:
- Low gear limit stop: Shift the front to the smallest chainring and the rear to the largest cog. Check the distance of the chain from the inner deflector. It should be just big enough for a 10-cent coin to fit inbetween. If too little space, unscrew the L-bolt a little, if too much play, tighten it.
- High gear limit stop: Shift the front to the smallest cog and the rear to the largest chainring. There should be a small gap of 1-3mm between the chain and the outer deflector. If too large, you must limit the derailleur by slightly tightening the H-bolt. If the chain slips, the H-bolt is loosened. If the H-bolt is completely unscrewed but the chain is still slack, the tension must be increased.
- Tension: For fine-adjustment, you shift up and down. If the chain does not move down without jarring, the tension is too high. Turn the tension screw on your gearshift lever in a clockwise direction. However, if the derailleur does not shift up without jarring, the tension is too low. If this happens, unscrew the tensioning screw.
There are some shifting processes, for example small-small or large-large, whereby slackening occurs, even though the derailleur is working perfectly.
Discover our Mountain Bikes
Did this article help?
Thank you for your feedback
